How To Prepare For Siding Replacement & What To Expect
Preparation is key when it comes to your siding installation process. Once you’ve chosen a contractor, selected your siding materials and paint color, and scheduled a date for your siding installation to begin, it’s time to get ready for it. You can have a stress free siding installation process with a few simple preparations.
Understanding The Siding Replacement Process
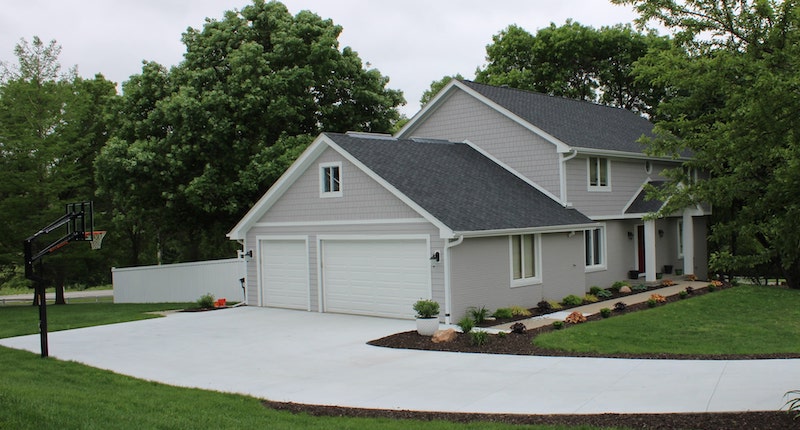
Upgrading your siding can transform your home by improving its appearance, increasing its value, and enhancing energy efficiency. New siding provides better insulation and protection against the elements, potentially lowering heating and cooling costs. Additionally, it’s an opportunity to update your home’s look, making it stand out in the neighborhood.
This guide is designed to walk you through everything you need to know about siding replacement, from the signs that it’s time for a change to selecting the right materials and preparing for the installation process.
- Understanding The Siding Replacement Process
- Before Your Siding Installation
- Plan ahead for your pets
- Plan ahead for your children
- Prepare your schedule
- Clean your yard
- Trim your landscaping
- Make room in your driveway
- Talk with your contractor about details
- During Your Siding Installation
- Removing & Disposal of Old Siding
- Identify & Repair Underlying Issues
- Install Weather Barrier
- New Siding Will Be Installed
- Paint New Siding
- After Your Siding Installation
- Final Walkthrough and Inspection
- Understand Your Warranty
- Yard Clean-Up
- Enjoy Your New Look
- Choosing the Right Contractor

Before Your Siding Installation
If you’re like most homeowners the bulk of your hardwork is complete at this stage of the game. You’ve decide what kind of siding is best for your Omaha home, determined the cost, saved or planned for financing, and designed your siding for great curb appeal. But don’t relax just yet. It’s worth a little extra effort to plan your installation process. It will make running your household smooth and easy while your siding contractor does the heavy lifting — a good one will do the job right to protect your siding warranty.
Plan ahead for your pets
For the safety of your pets, it’s simplest to plan to have them away from the home during your siding installation. The exception to this would be if you have an indoor pet, and they can handle the sound of construction as well as the need to be indoors during your installation.
Plan ahead for your children
Young children love playing outdoors, but for their safety, they should either be inside or away from the home while you’re having your siding installed. Avoid the possibility of accidents or mishaps by planning ahead for your kids.
Prepare your schedule
Ask your contractor for the siding installation timeline and mark your calendar for your remodel. Realize there may be some inconveniences like a dumpster in your driveway, and a noise factor as your siding is being installed.
Clean your yard
Mow your grass super low before your siding installation begins. Shorter grass makes it easier for your contractor to use a magnetic nail finder to pick up any nails that may have landed on your grass during your siding installation. Pick up all children’s toys, potted plants, patio furniture, and gardening tools so your contractor can easily access your home’s siding.
Trim your landscaping
Cut your trees and bushes back as needed so your contractor can easily access your siding. Make it easy on your contractor to get to your siding from the ground to the top of your home. It’s a great time to do the tree trimming your yard needs, and it will add to the finished look of your home after your new siding is installed.
Get ready for some shaking—Although it may be subtle, your home could shake during your siding installation. Before your contractor arrives to begin your installation process, take all the pictures off your walls throughout your home. Find a safe spot for any fragile valuables at risk of falling. Wall pictures can simply be remounted once your siding installation is complete.
Make room in your driveway
Clear away all bicycles and cars from your driveway so your contractor can deliver a dumpster into it to dispose of your current siding and debris. Park your cars away from your home to decrease the possibility of incurring any damage from loose debris.
Talk with your contractor about details
Before your siding installation begins, check with your contractor about your shutters and downspouts. Find out if you or the contractor should remove these before your siding installation begins.
During Your Siding Installation
When you choose Tevelde and Co. for your siding installation project, you’re selecting a company committed to professionalism, quality, and customer satisfaction. Here’s what you can expect during your siding installation experience with Tevelde and Co.:
- Professional Crew: On the day of installation, our skilled and courteous crew will arrive on time, ready to transform your home. Our team members are trained to the highest standards and will treat your property with respect.
- Project Management: A project manager will oversee the installation from start to finish, ensuring that the work is carried out efficiently and to our high standards. They will be your point of contact, available to answer any questions or address concerns you may have during the process.
Removing & Disposal of Old Siding
Your siding replacement begins with the removal of your current siding. Skilled professionals will carefully remove the old siding, starting from the top and working their way down to ensure a controlled and efficient process. Special attention is given to areas around windows, doors, and corners to prevent damage to the underlying structure. Your contractor will then dispose of your old siding in a dumpster they provide for the project.
Identify & Repair Underlying Issues
Unfortunately, there can be hidden problems below your current siding. Once your old siding is removed, your contractor will inspect your home’s walls carefully to make sure they are in good condition. If you have wood rot due to moisture penetration, your contractor will fix the problem so your home’s structure is in fabulous shape before installing your new siding. Ensuring the wall under your new siding is in excellent condition will lay the foundation for a successful siding installation.
Install Weather Barrier
If you are having James Hardie siding installed, your contractor will cover your home in a weather barrier called HardieWrap®. This barrier is Engineered for Climate® and will stand up to the weather unique to your specific area of the country.
HardieWrap is your home’s second line of defense, and it has two main functions: water resistance and breathability. It keeps the area within your walls dry, and prevents mildew. This outstanding product also decreases your home’s energy loss, and yields energy savings for you on utilities.
New Siding Will Be Installed
This is the most labor intensive part of the process: the siding installation itself. Installation typically starts at the bottom of the home and works upwards. This method helps to ensure that each piece of siding overlaps the one below it, which is crucial for water drainage and protection. Special attention is paid to the areas around windows, doors, and corners. Flashing and trim are installed to ensure a clean, finished look and to prevent water infiltration. Throughout the installation process, quality checks are conducted to ensure that the siding is properly aligned, securely attached, and that the installation meets all manufacturer specifications and industry standards.
Paint New Siding
If you have James Hardie fiber cement siding installed, it can come with baked-on color that was applied at the factory for even distribution. This ColorPlus technology doesn’t need any painting once it is installed. James Hardie siding also comes pre-primed and ready to paint any color you choose after installation. It will take a few extra days to have your home painted.

After Your Siding Installation
After the completion of your siding installation, it’s important to know what steps to take next to ensure your investment is well-protected and maintained.
Final Walkthrough and Inspection
With your contractor, inspect the new siding installation to ensure everything has been completed to your satisfaction. Check for proper installation around windows, doors, and corners. If you notice any issues or have any concerns, now is the time to bring them up with the contractor to have them addressed promptly.
Understand Your Warranty
Make sure you fully understand the warranty provided for your siding materials and the installation work. Know what is covered, the duration of the warranty, and how to make a claim if needed. These documents may become important for future reference or if you encounter issues with your siding.
Yard Clean-Up
The installation site will be thoroughly cleaned, removing all debris, materials, and equipment. Your contractor will clean the work site thoroughly and work his way through your yard with a magnetic nail finder to ensure there are no nails left on your property. Your property will be left in a neat and orderly state.
Enjoy Your New Look
Whether you have a rustic chic Farmhouse look accomplished with Board-and-Batten siding or classic HardiePlank Lap siding, you’re sure to love the look of your siding replacement.

Choosing the Right Contractor
Selecting a skilled and reliable contractor is crucial for a successful siding replacement. Verify their credentials, insurance, and track record. Ask for detailed quotes and read the contract carefully before signing. A good contractor will make the process smooth and ensure high-quality work. Learn more about why Tevelde and Co. is the right contractor for your Omaha siding replacement project.

Article Updated: 4/16/24 | Published: 2/3/22
About The Author: Todd Tevelde
Todd Tevelde wrote the article Tips For A Smooth Siding Installation Process: What To Prepare & What To Expect to help educate homeowners about their siding installation process. Todd is an expert in home exterior renovations and the founder of Tevelde and Co. With over 10 years of experience helping homeowners, Tevelde and Co. has become one of the most trusted contractors in the greater Omaha area. For more information contact Tevelde and Co. today!
[trustindex no-registration=google]
 Siding Services
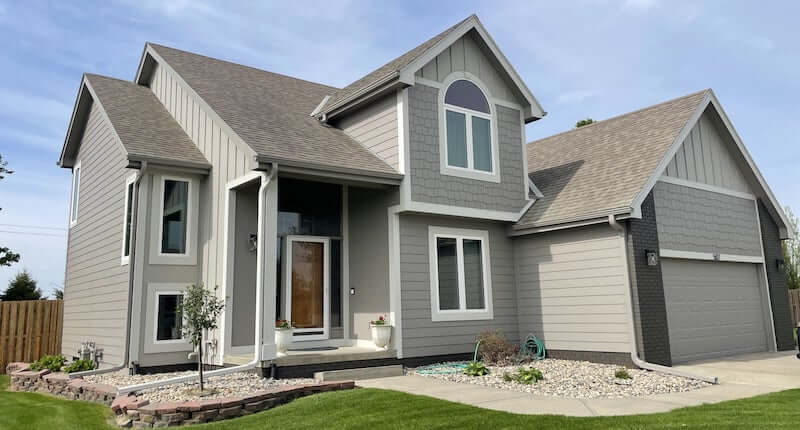 Window Services
 Painting Services
 Roofing Services
James Hardie Fiber Cement Siding
As the leading fiber cement siding on the market, James Hardie® siding is trusted by homeowners and siding contractors alike for its reliable performance. With its patented technologies that help it withstand any weather and hold in color, Omaha homeowners can rely on James Hardie siding to last for decades while continuing to look beautiful.
Financing Is Available.
Sometimes home remodeling projects can’t wait, or you just want to make all your property updates at once. Get the financing you need with approved credit and check out our special offers to make the most of your home remodeling dollars.


![]()